Posts

Showing posts from March, 2020

Where to Get 3D Printing Filament and What to Buy

Image
Plastic Procurement Plainly Put           Which Plastic to pick?, 1           3D printing is an exciting and fun hobby to dive into! Taking ideas from inside your head or off of the internet and being able to feel them in your hands only a few hours later is a feeling worth experiencing. Once you grasp the notion firmly, you will find the ability to solve problems you didn't even know you had before! But how do you select which plastic is perfect for your part? Are you floundering while finding your filament? Read ahead, and perhaps you will find yourself closer to your first or finest print!             Printer Considerations:           The first question one must consider when deciding what filament to acquire should be "what filament does my printer need as configured?" Most printers are built to be reconfigurable to use different sizes of filament and nozzles with some work. Most printers released in the past few years have their extrusion sys
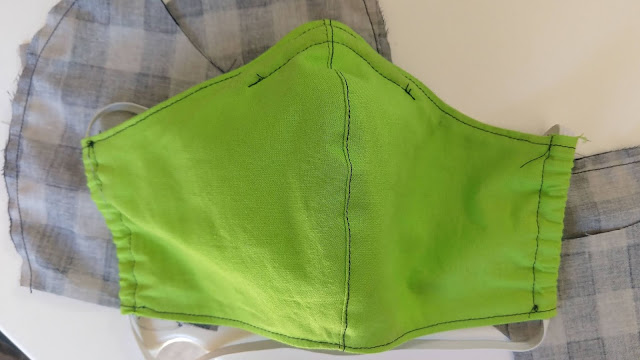
Fabric Face Mask - Maker Craft Live!

Image
Hey makers! If you haven't seen our second Maker Craft Live, you can check it out now at  this link . In it, our technician Ronni shows you how to sew your very own protective face mask! This mask isn't 100% protection against viruses and disease, but it is a good tool to help limit the particles you breathe in, and also limit face touching. As long as you have a sewing machine and some scrap fabric at home, it can be very easy to make! For this project, you'll need: A sewing machine, or needle and thread  Fabric (preferably non-stretch tightly-woven cotton, and flannel. You'll need at least two layers, but if you're using a looser-weave fabric, three or more is preferred. Just make sure you can breathe through it all!) A 4-inch posable wire (pipe cleaner, floral wire, jewelry wire, or armature wire all work) Elastic or ribbon (elastic will fit more tightly and not slip off - ribbon will sanitize better in the laundry) The pattern piece for this proje

Where to Get Laser Cutting Supplies

Image
    The "Bat Laser," so named for the      background image on the computer    By Michele McNeilly Last November the Creation Station finally installed our long awaited Laser Cutter from Universal Laser Systems. After all the heartbreak, stress and tears that came with our previous laser, we were overjoyed to have a machine that WORKED and worked beautifully.        Once staff completed training, we began teaching our Laser Cutting Level 1 class in December which focuses on how to laser cut wood and acrylic materials.  In March 2020 the MakerSpace staff finished the lesson for Level 2 which involves etching glass, painted metals and using a rotary fixture for round objects.   If you've taken our Laser Cutting classes, or plan to take the class, you might be wondering, "Where would I get the materials to laser cut?"  There are several places you can buy materials from, and the Creation Station is here to break it down for you. Wood Materials

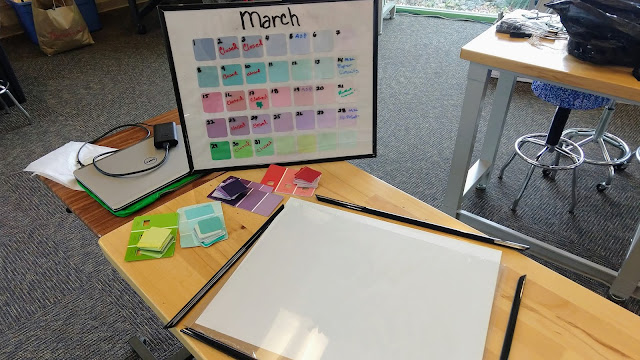
Paint Chip Dry Erase Calendar - MakerCraft Live!

Image
Our finished calendar, from a few months ago, along with the supplies for our new calendar Hey makers! We held our very first Facebook live yesterday, and gave a tutorial on how to make a a dry erase calendar with paint chips. For everyone who missed it, you can watch the whole video (it's a little less than 30 minutes) here:  Paint Chip Dry Erase Calendar . But we wanted to give a written version of the instructions as well! For this project, you'll need A 16x20 inch poster frame 35 paint chips (larger, single-color paint chips are preferred) A marking pencil A long straight-edge ruler (or any ruler, plus one long straight edge) Glue or double-sided tape (we used double-sided crafting tape) The first thing you'll want to do is cut each paint chip into 2-inch squares. This part takes the longest to do, so don't get discouraged! When you're done, you should be able to lay them out in a 5 x 7 grid. You can decide now which order you want the colors